
Project Description
Design Flow, LLC – Murphy Bed Inspired by Roark
As an Amazon Associate, we earn from qualifying purchases on the products we’ve linked below. Your support by using these links help us tremendously.
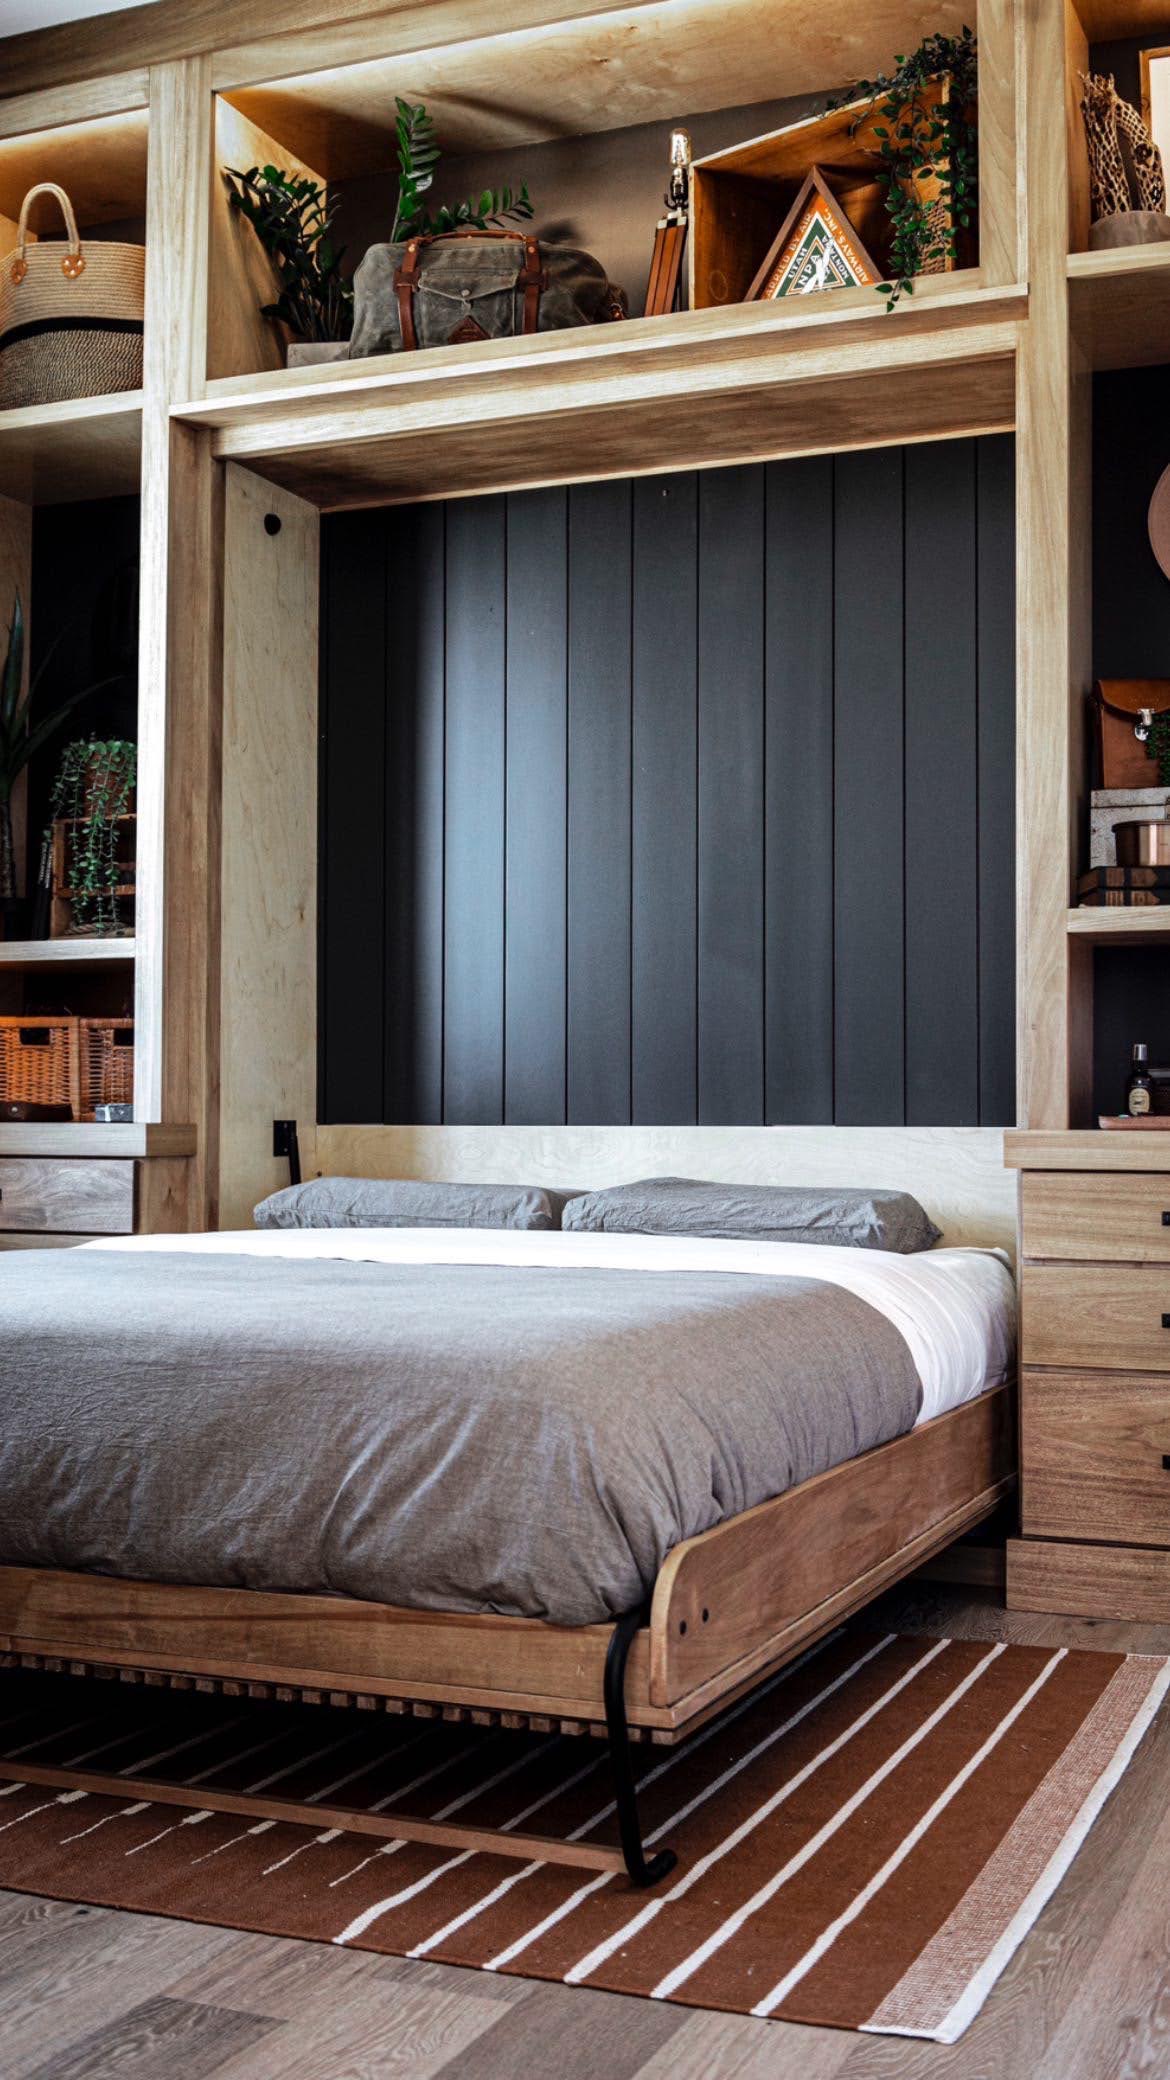
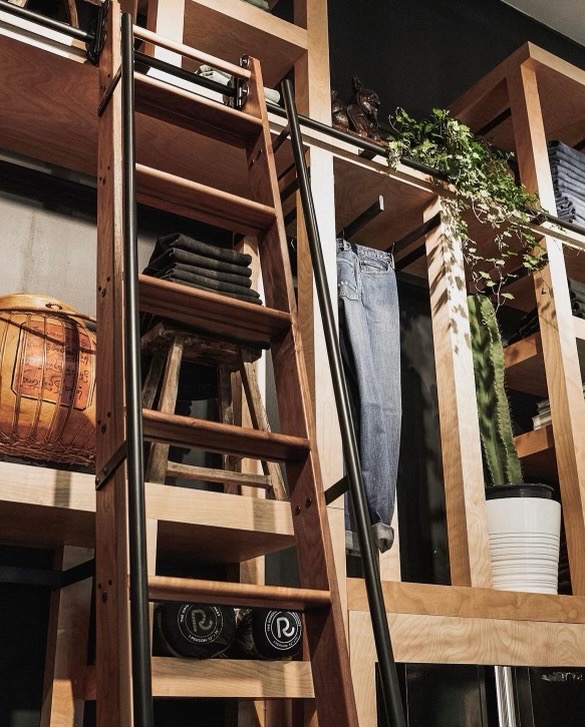
Step 1: Gather Inspiration
Start by collecting photos and inspiration images that capture the essence of Roark’s style. This will serve as the foundation for your Murphy bed design.
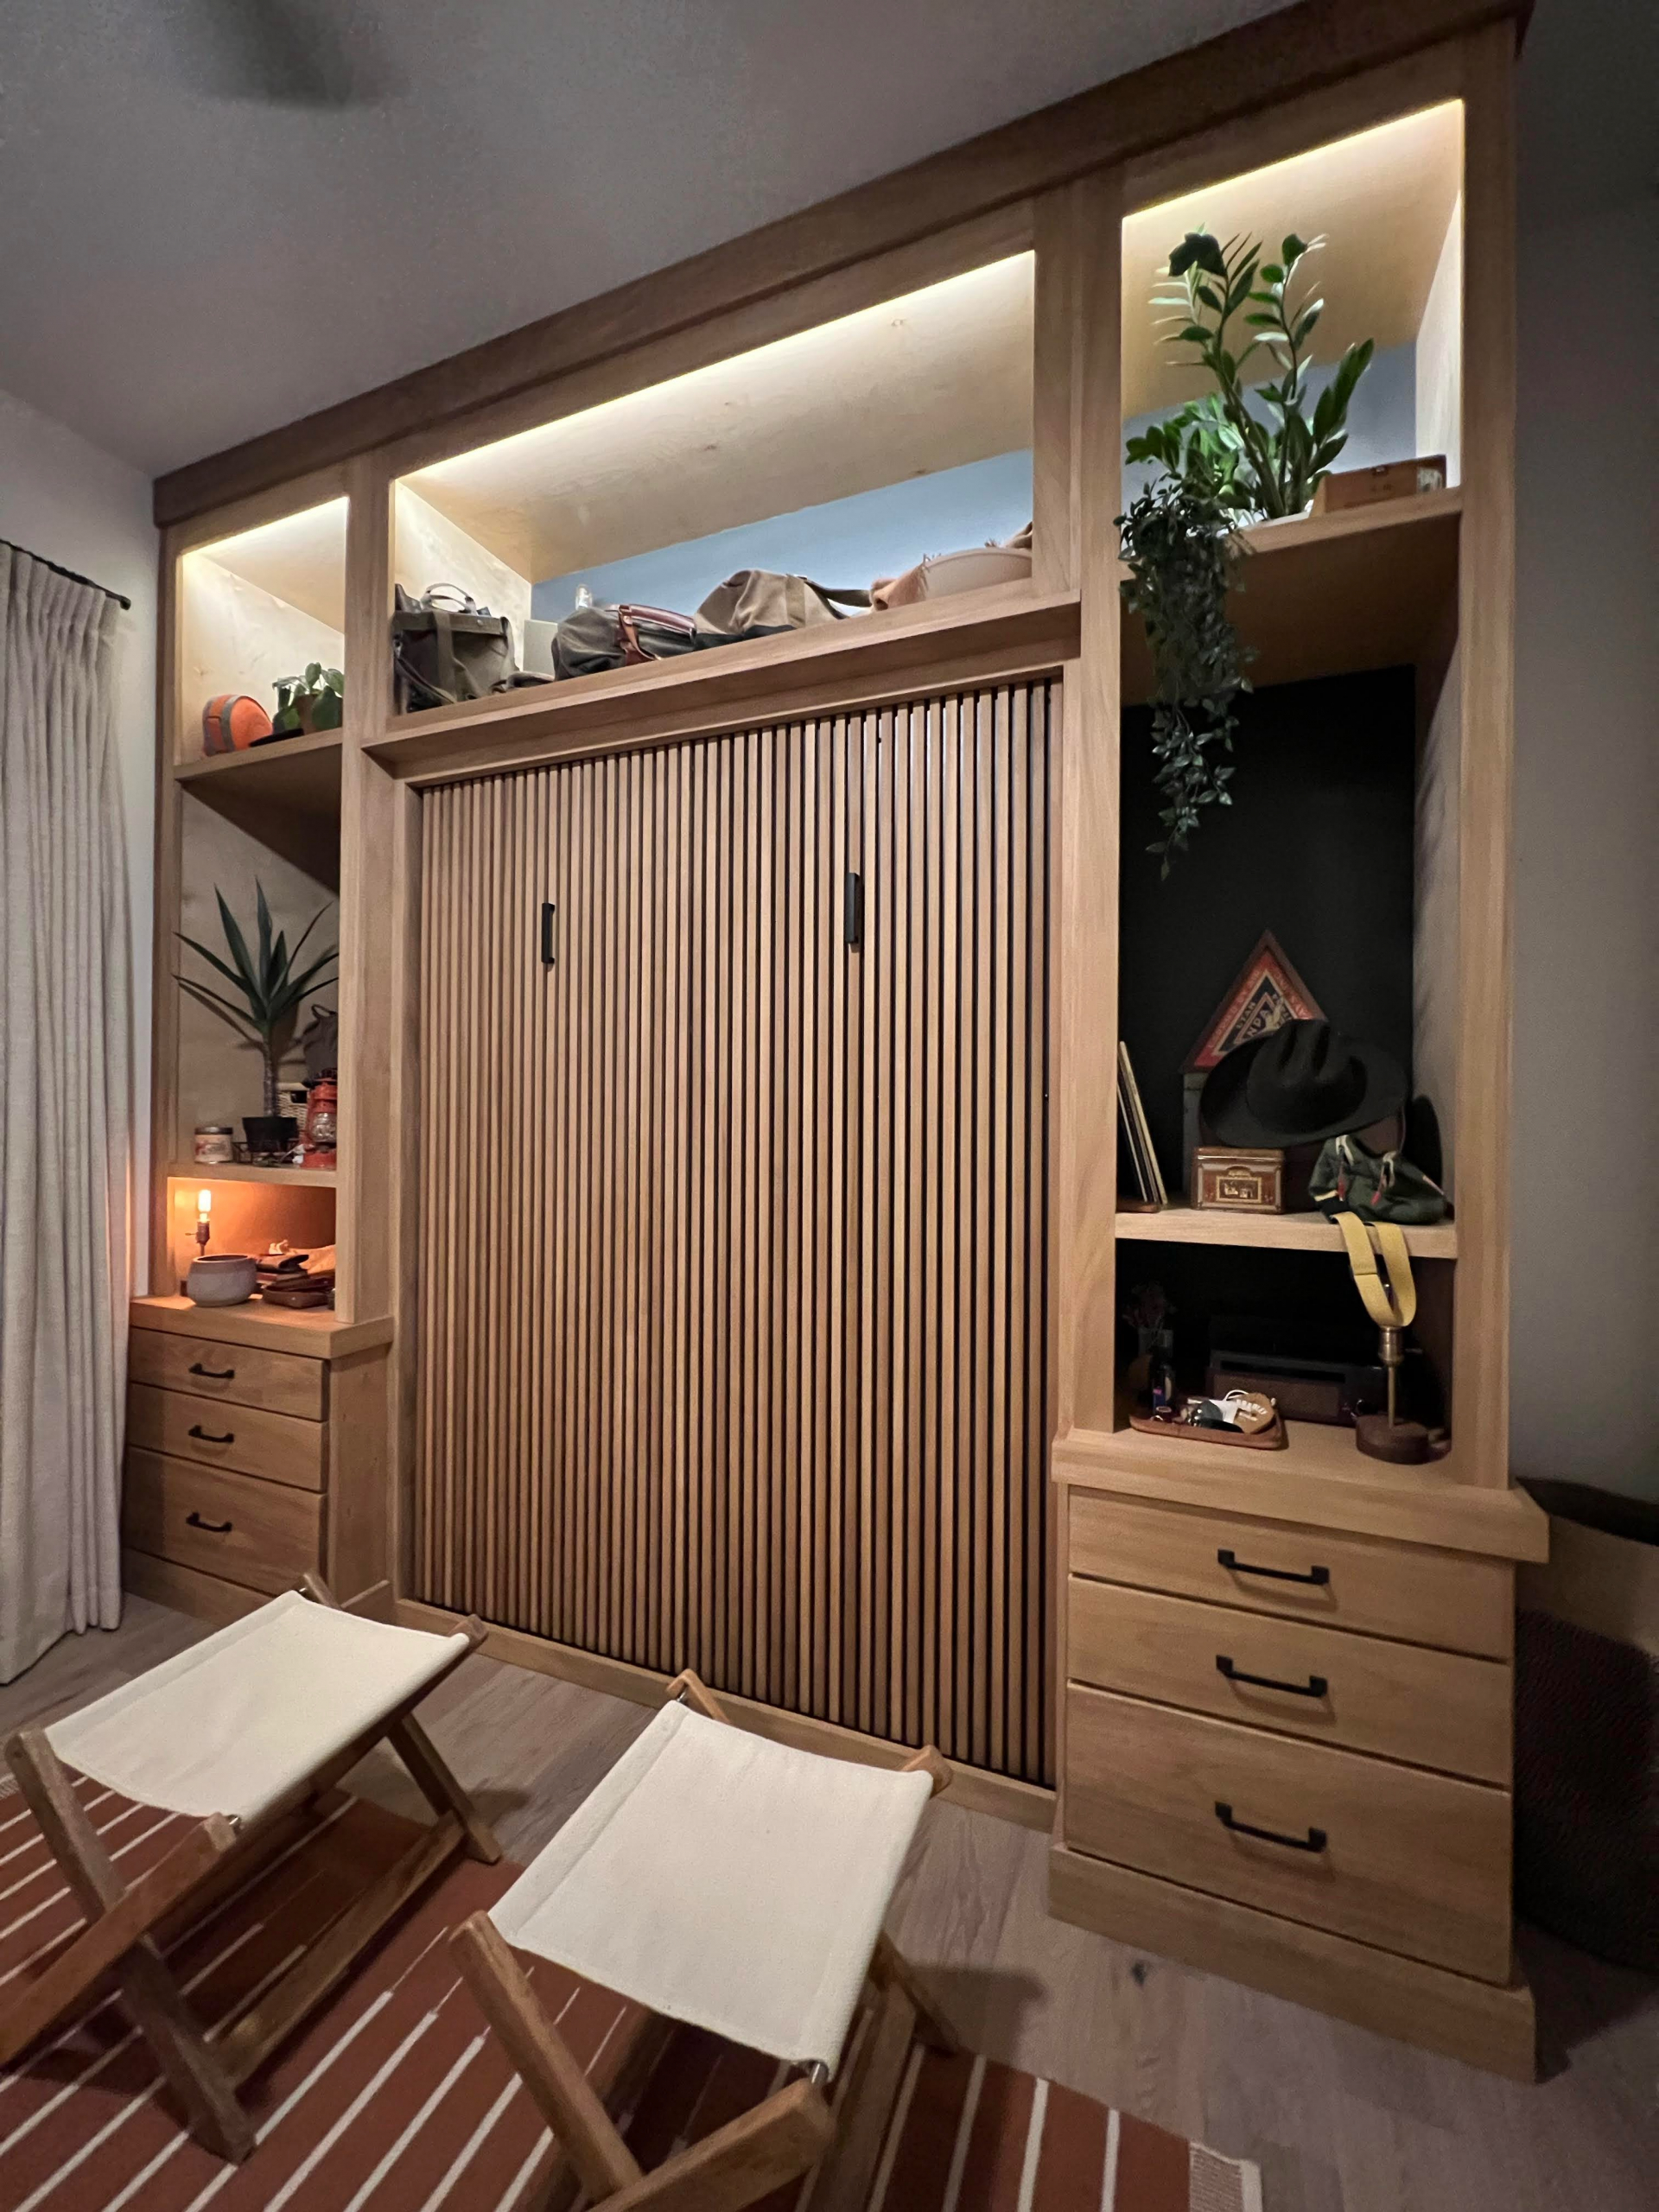
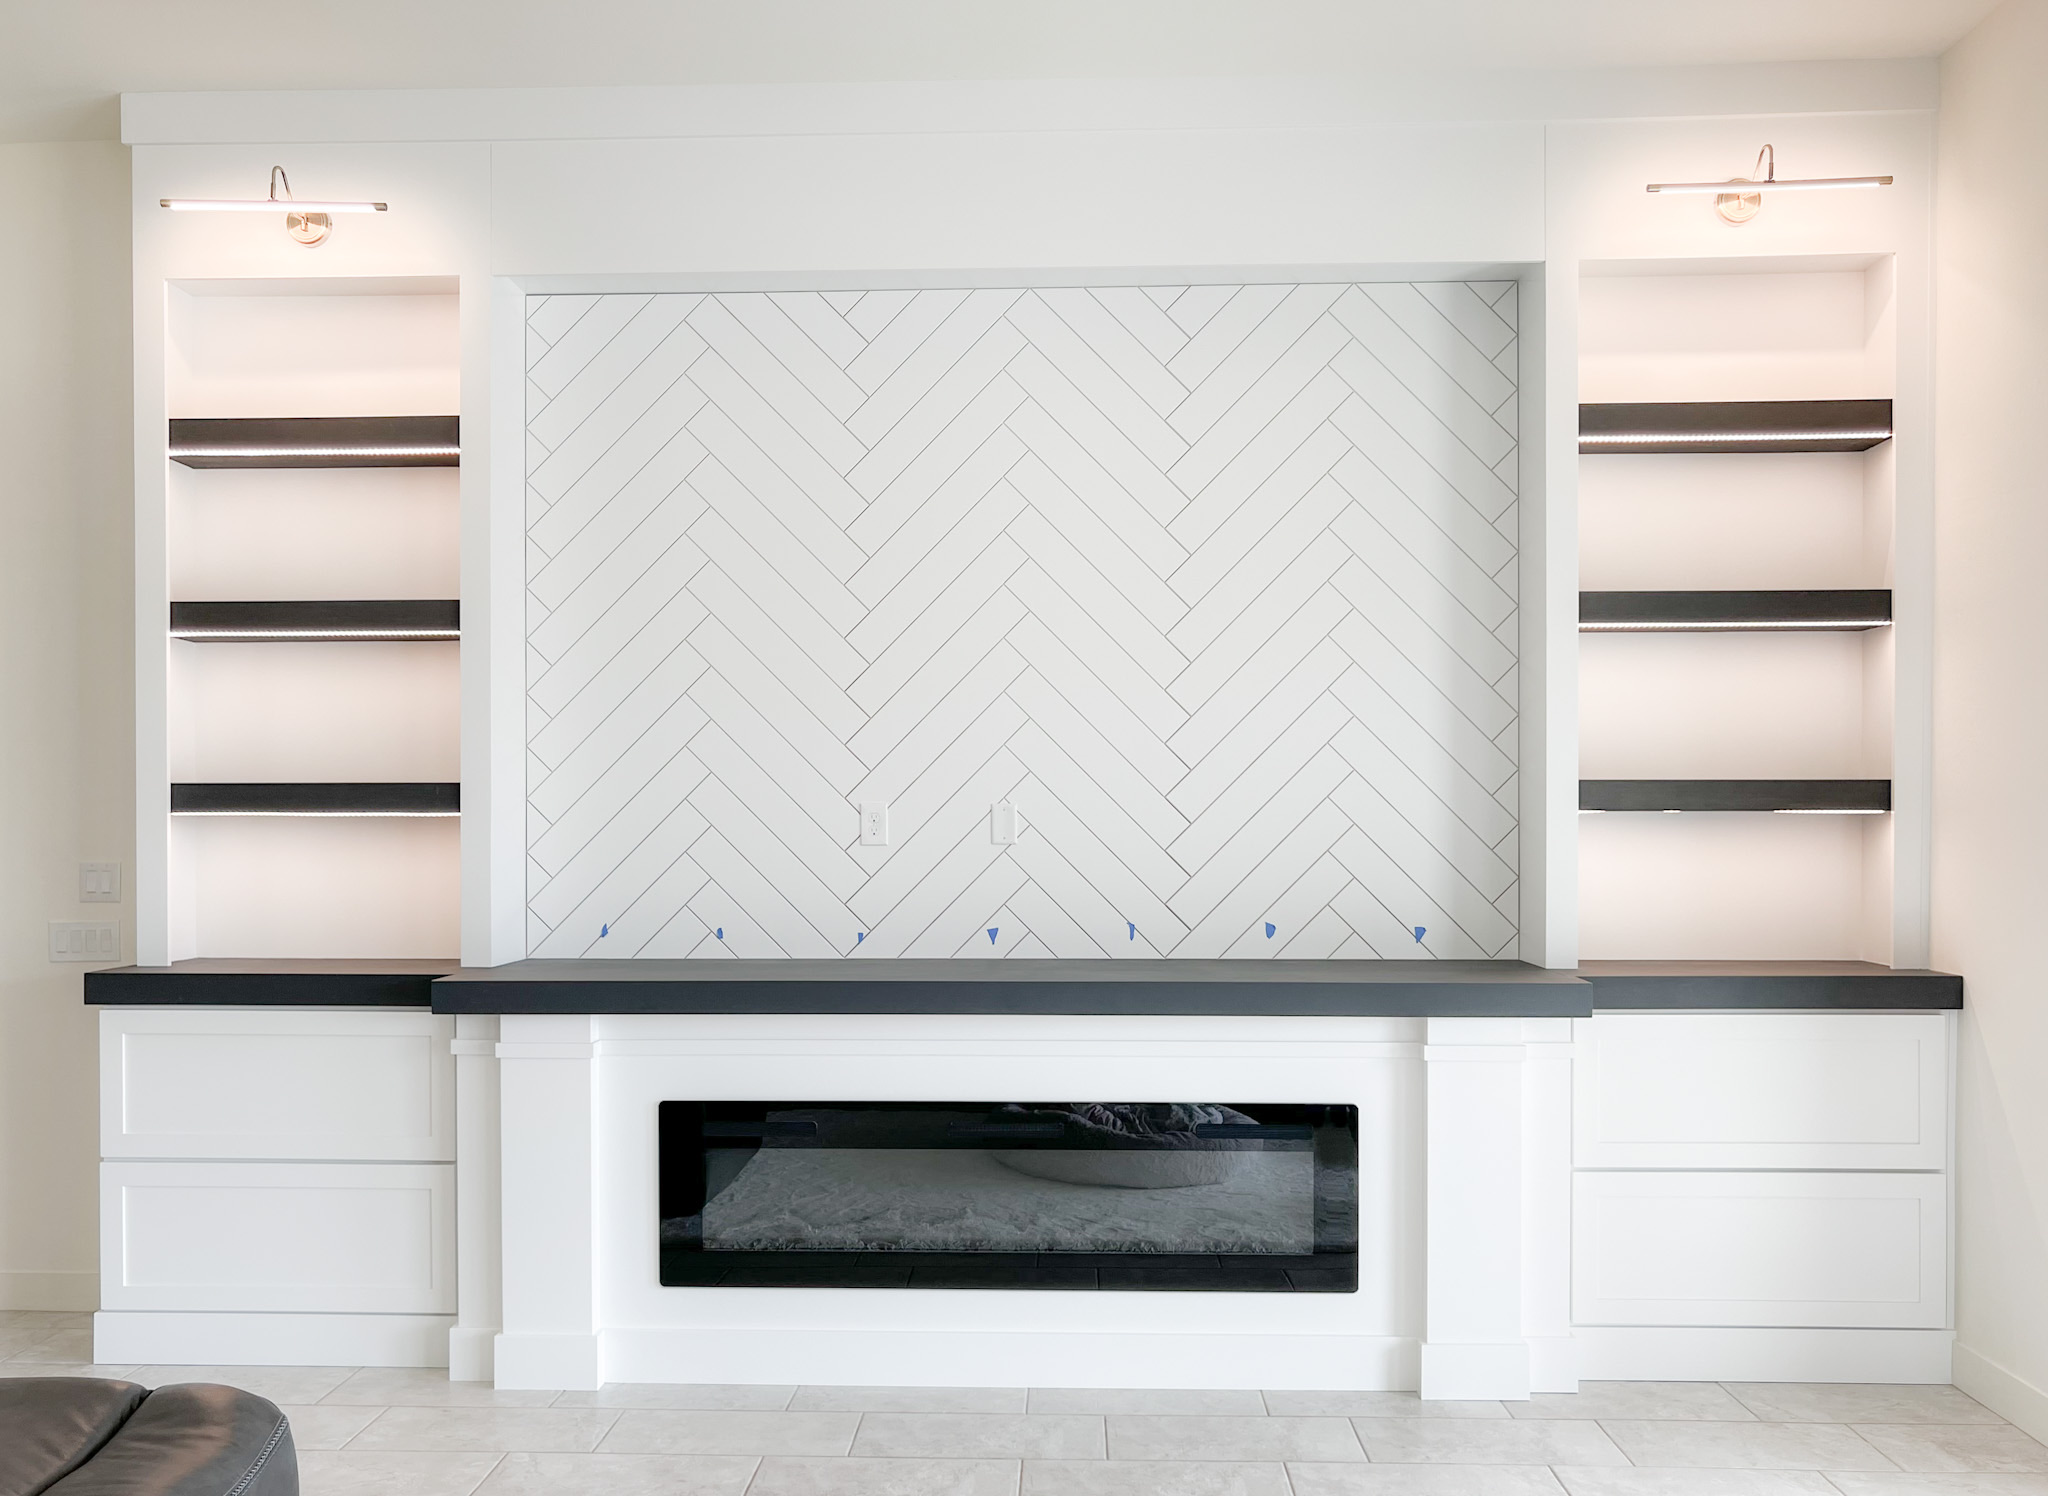
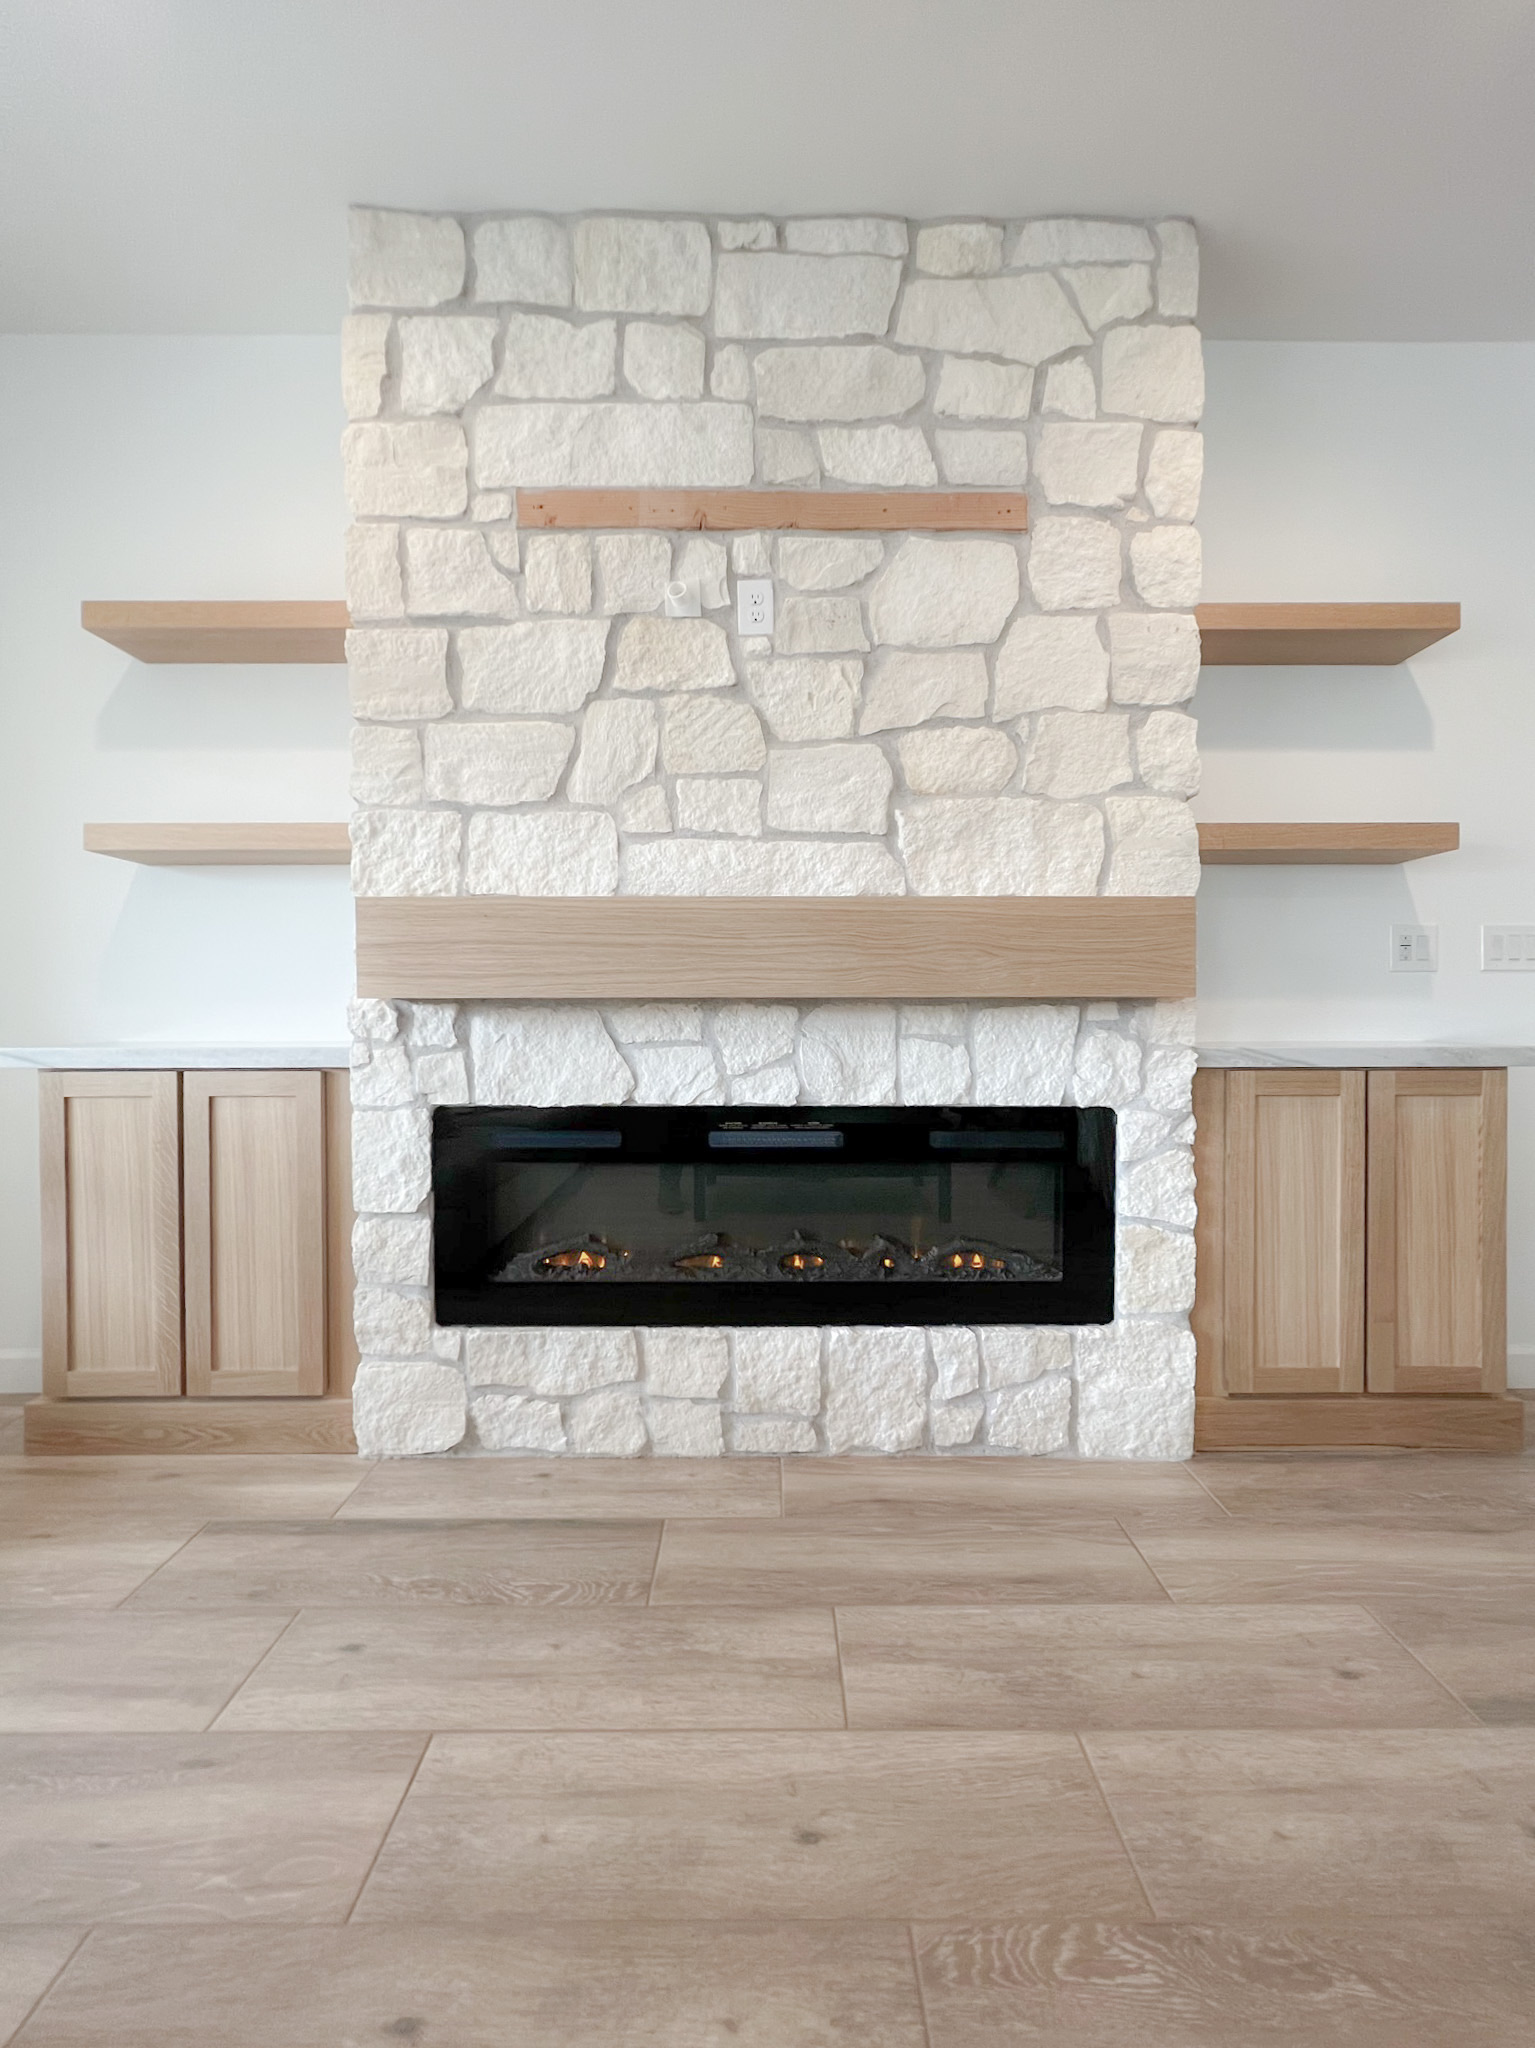
Our clients gave us these photos and asked for a bed that custom fit their space and needs.

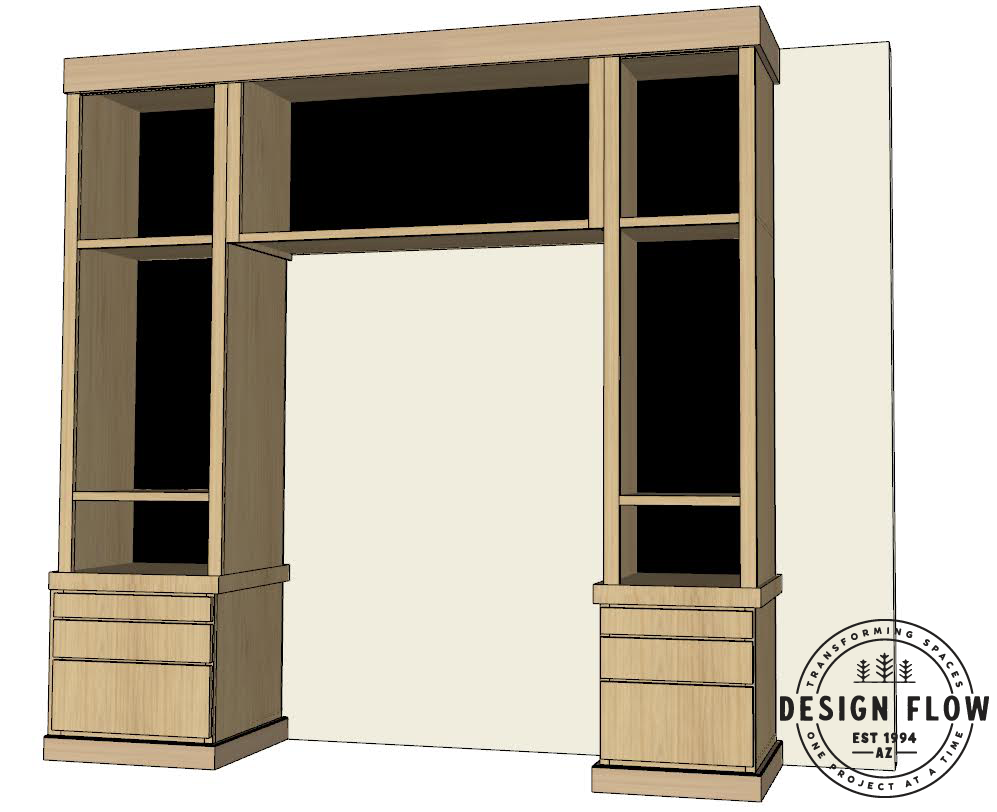
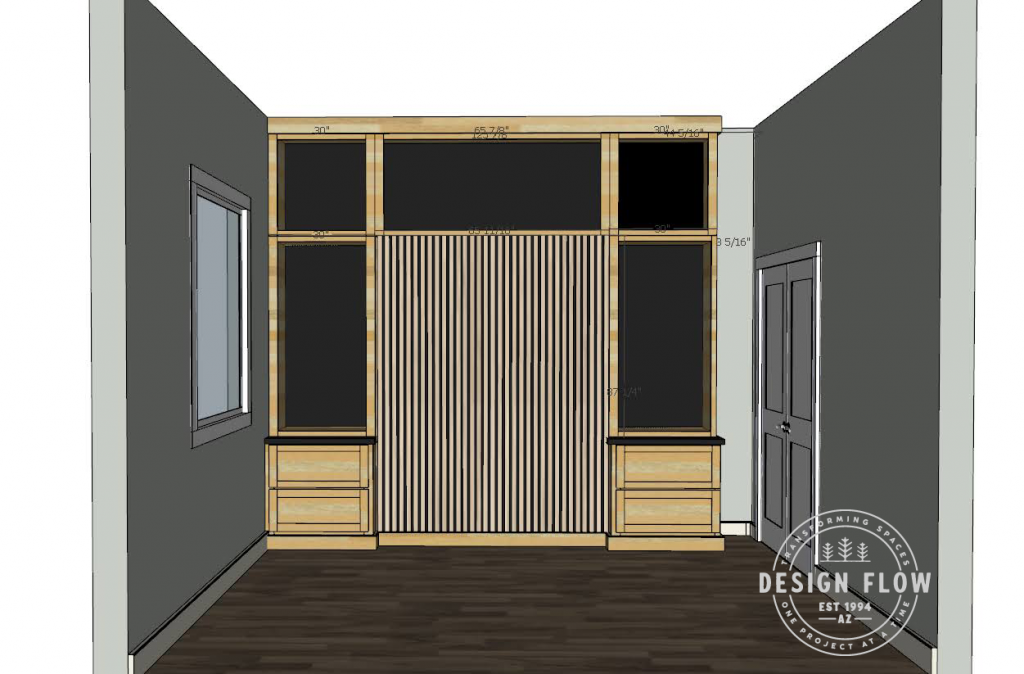
Step 2: Design the Concept
Create rough sketches or digital mock-ups of your Murphy bed design, incorporating elements from the Roark inspiration photos. Consider space-saving features and aesthetics.
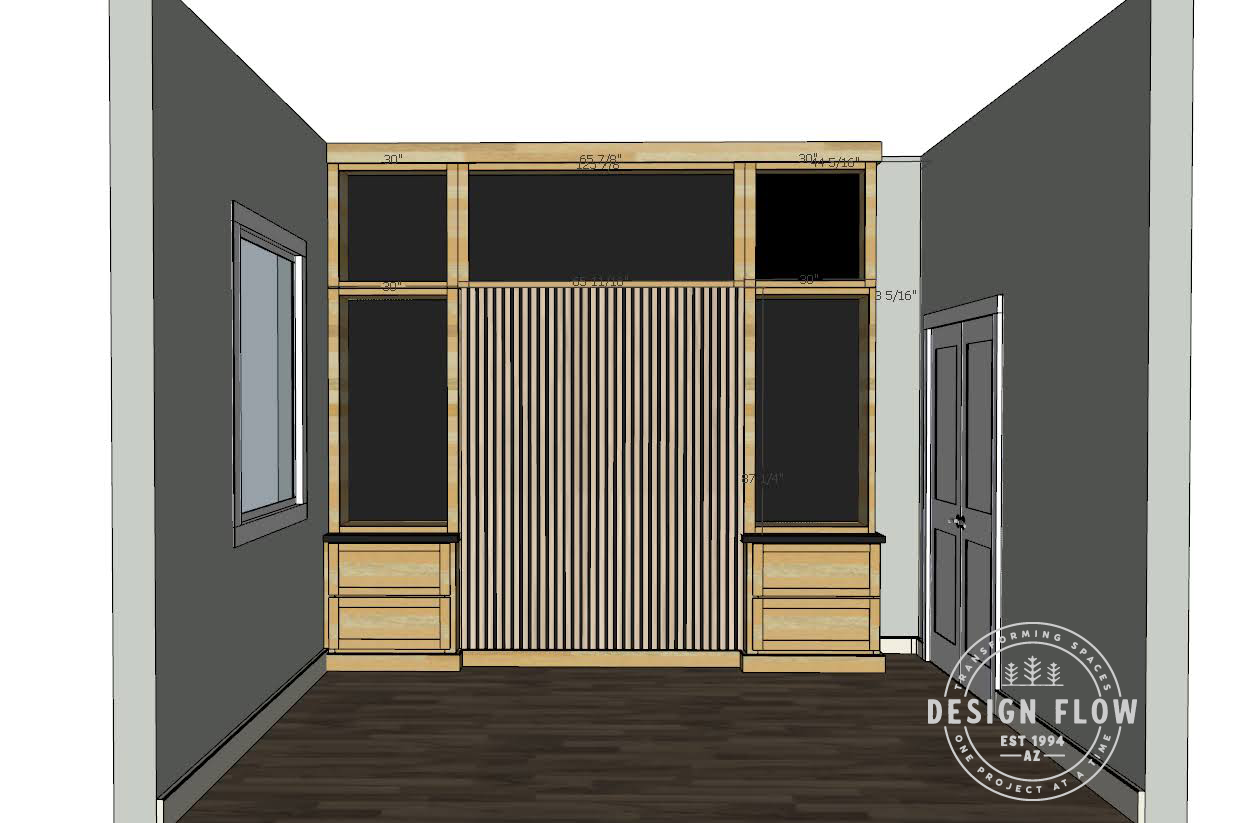
We use a combination of Mozaik Software to create the cabinetry and SketchUp tie together the Murphy Bed size into the room. Some minor modifications were made to the drawer face style from the initial mock-up and some additional trim pieces were added for accommodate the face frame that was made for the Queen Murphy bed itself.
The 3D mock-up designs below.
Step 3: Materials and Measurements
We use Leica 838725 DISTO D2 New 330ft Laser Distance Measure with Bluetooth 4.0, Black/Red, 1.7 x 1 x 4.6 inches, but you can use a tape measure, phone app whatever you’re used to. Get the size of the wall and ceiling you want your Murphy bed on.
Determine the materials needed for the project. Queen Size Deluxe Murphy Bed Kit, Vertical
Measure the space where the Murphy bed will be installed to ensure a perfect fit. In this case the width from wall to wall is: 140 7/32” wide (you can round this, but the Lecia is very accurate) and 120 5/16” tall. Brooks did have to leave room for the closet door access that is on the right side of this room.
Step 4: Create a Materials List
Compile a comprehensive list of all the materials required, including wood, hardware, and any decorative elements that align with Roark’s aesthetic.
For the Create-A-Bed Queen Murphy Bed we used.
4 @ 3/4” birch plywood
2 @ 1/4” birch plywood
The cabinets used:
4/4 poplar, 1/2” MDF, 1/2” birch plywood, 1/8” hardboard painted black for backing on slats under bed, 1/4” MDF, 1/2” Baltic birch for drawer boxes. 21” undermount Blum Drawer Glides, power strip, Armacost LED tape light.
Step 5: Build the Frame
Construct the frame of the Murphy bed, following your design concept. Ensure it’s sturdy and capable of supporting the mattress and any additional features.
Step 6: Add Functional Features
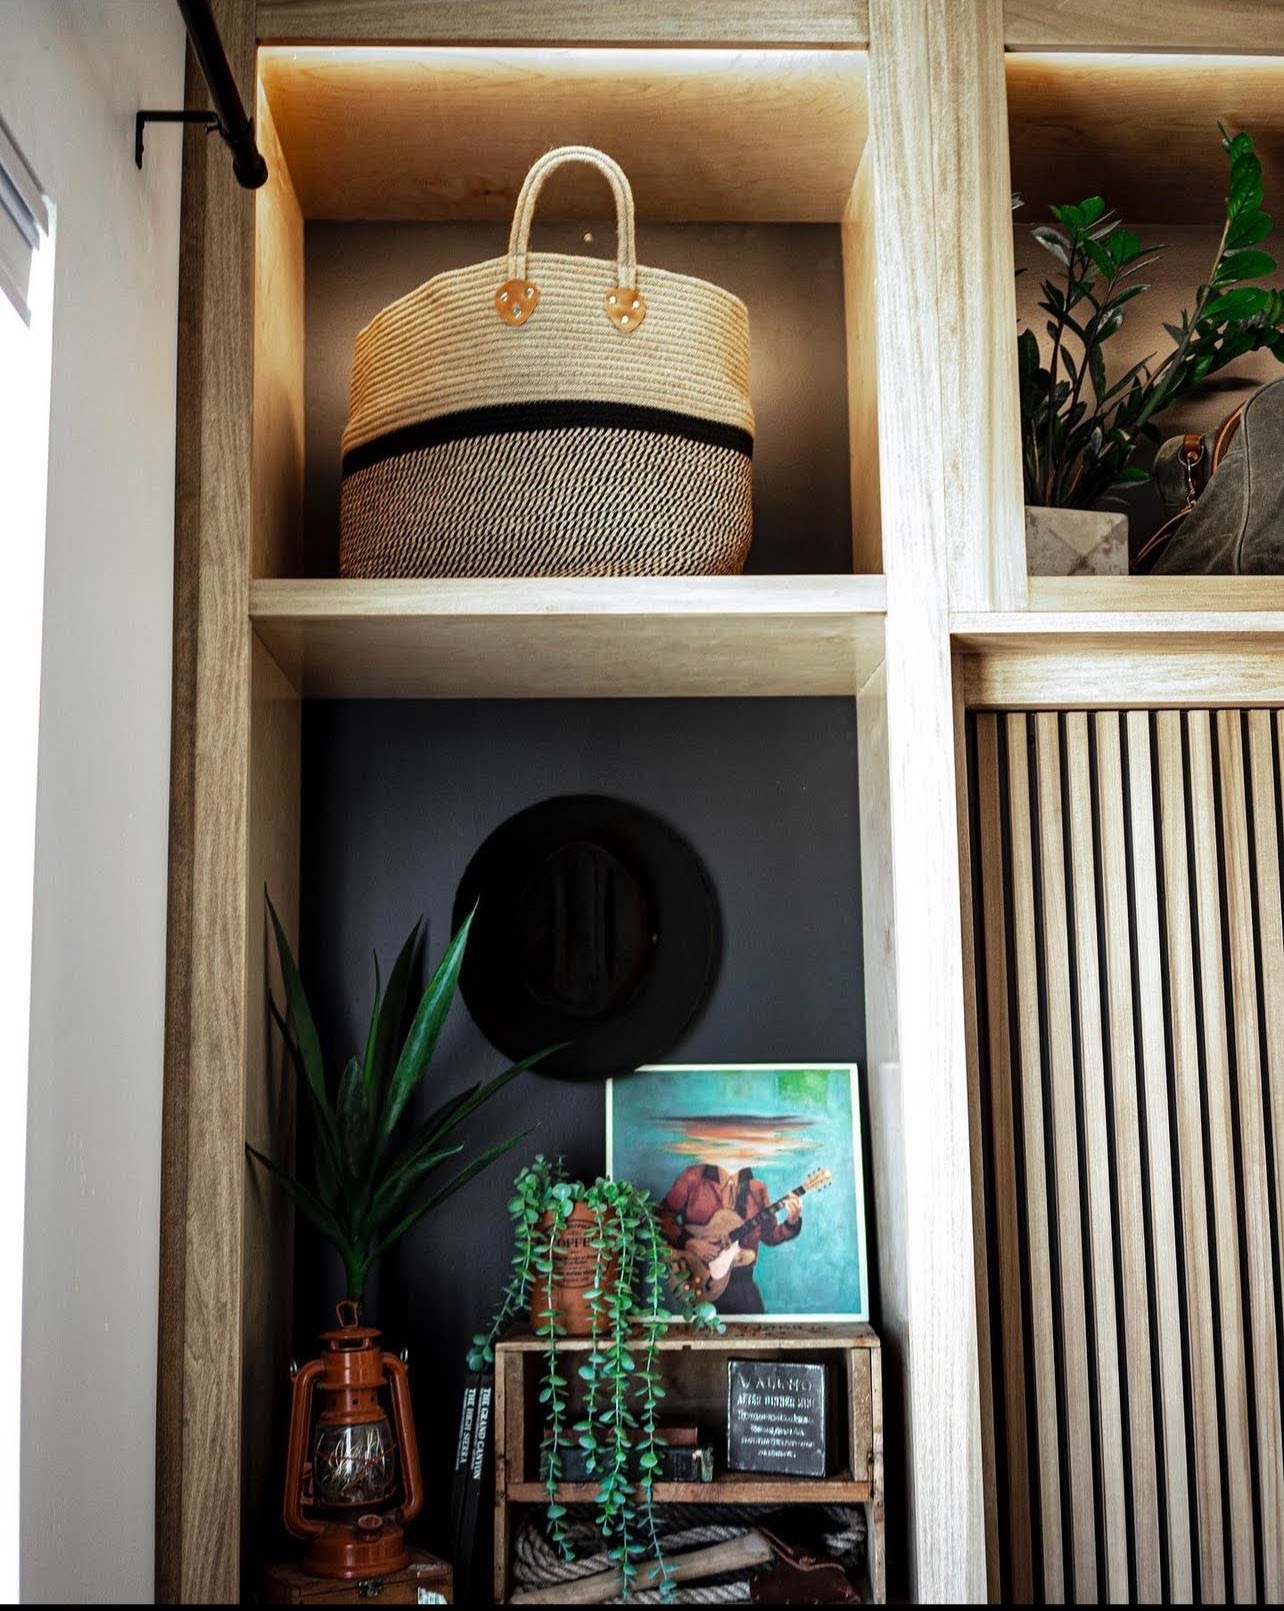
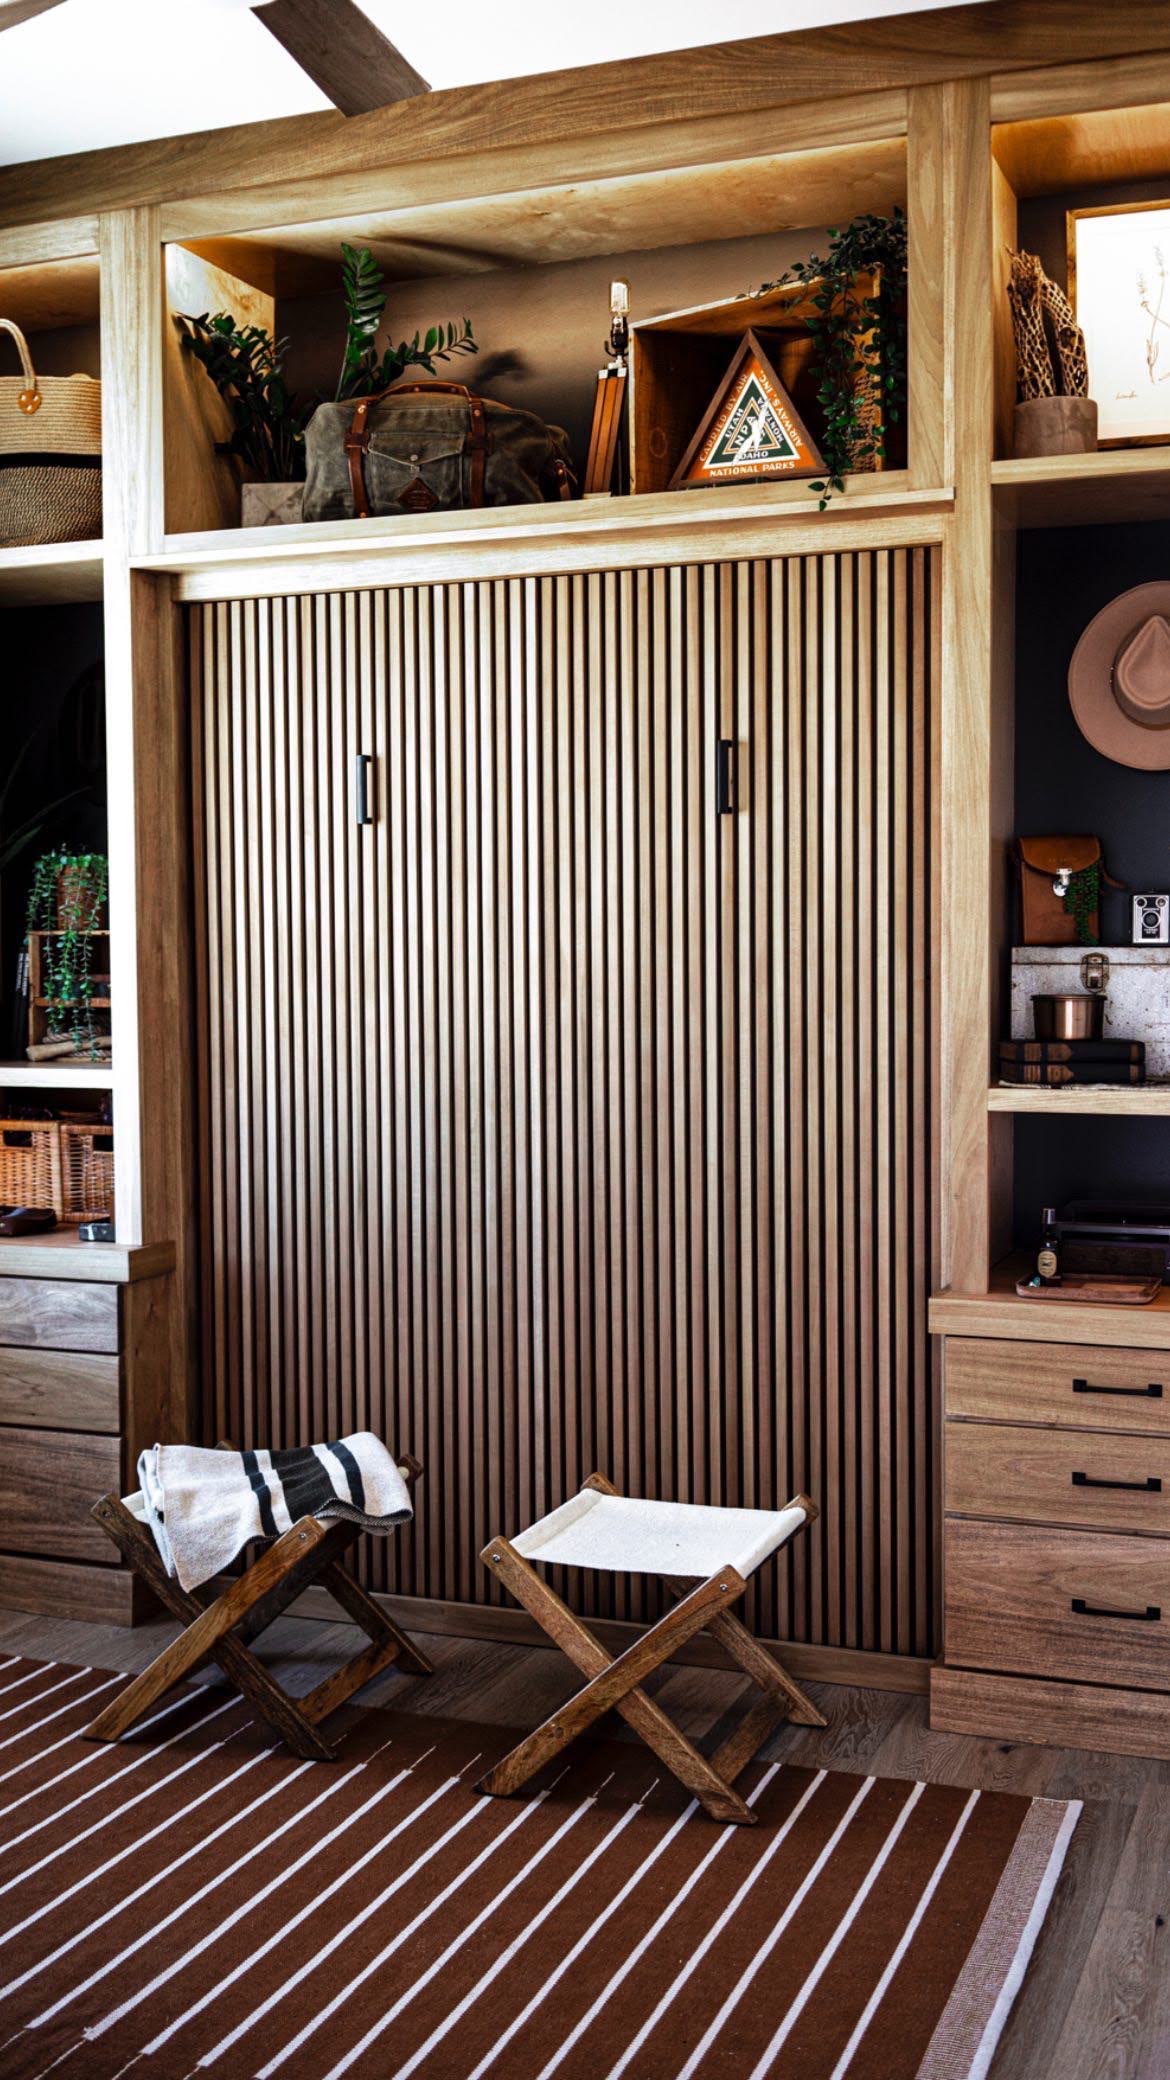
Incorporate space-saving features such as shelves, cabinets, or hidden storage compartments, keeping Roark’s style in mind.
Step 7: Apply Finish
Finish the Murphy bed frame with the chosen stain or paint to achieve the desired Roark-inspired look.
The Poplar was stained with General Finishes Antique Oak, which gave it a quality walnut look at a fraction of the cost.
Step 8: Install Hardware
Attach the necessary hardware for the bed to fold up and down smoothly. Make sure it’s secure and functional.
Step 9: Mattress and Bedding
Select a comfortable mattress that fits the Murphy bed frame. Add bedding and pillows to complete the look.
For this Queen Bed we chose:
And the 2” topper:
With the 10” mattress and the 2” topper it still fits and closes good with the Murphy bed kit.
Step 10: Final Touches
Incorporate decorative elements, such as wall art in this case we used vertical shiplap or lighting, we used Armacost LED tape lights on a remote, to enhance the overall Roark-inspired aesthetic of the room.
Step 11: Testing and Adjustments
Test the Murphy bed to ensure it operates smoothly. Make any necessary adjustments for functionality and aesthetics.
Step 12: Enjoy Your Roark-Inspired Murphy Bed
Once everything is in place and working perfectly, you can enjoy your stylish and space-saving Murphy bed, inspired by Roark.

